Image Generation with Make.com

Make.com (formerly known as Integromat) is a versatile automation platform that helps simplify and orchestrate your workflows. It serves as a central hub that connects hundreds of apps, making complex automation feel intuitive and accessible—even for non-technical users.
With an ever-growing library of integrations—including Google Workspace, Mailchimp, Shopify, Facebook, Etsy, Tally, and many more—Make.com allows you to seamlessly link tools you already use. Among these is RenderForm, which you can use to generate dynamic, personalized images automatically as part of your workflow.
Whether you're running marketing campaigns or sending personalized emails, automated image generation can save you time, boost consistency, and add a professional touch to your communication.
Automating Images with Make.com
Make allows you to build custom workflows by chaining together multiple apps and services. In just three simple steps, you can set up a process to automatically create personalized images:
- Define a trigger event (e.g. a submitted form),
- Design an image template in RenderForm,
- Set up your Make scenario to generate the image and deliver it.
Let’s walk through a practical example to show how it works.
Step 1: Define the Trigger – Tally Form
First, you need to choose an event that will trigger the automation. This could be anything: a new user sign-up, a new entry in your Airtable base, a submitted Google Form, or in this case—a filled-out form in Tally.
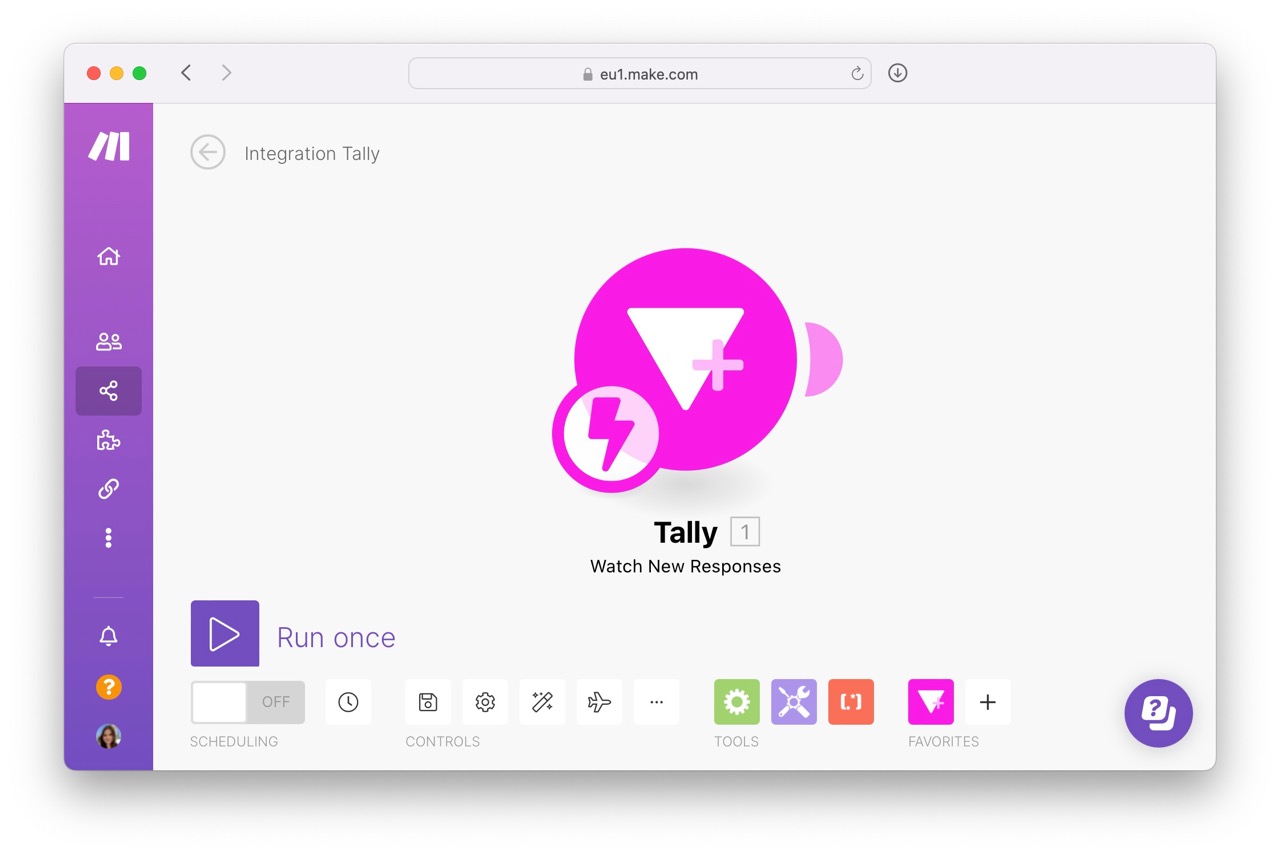
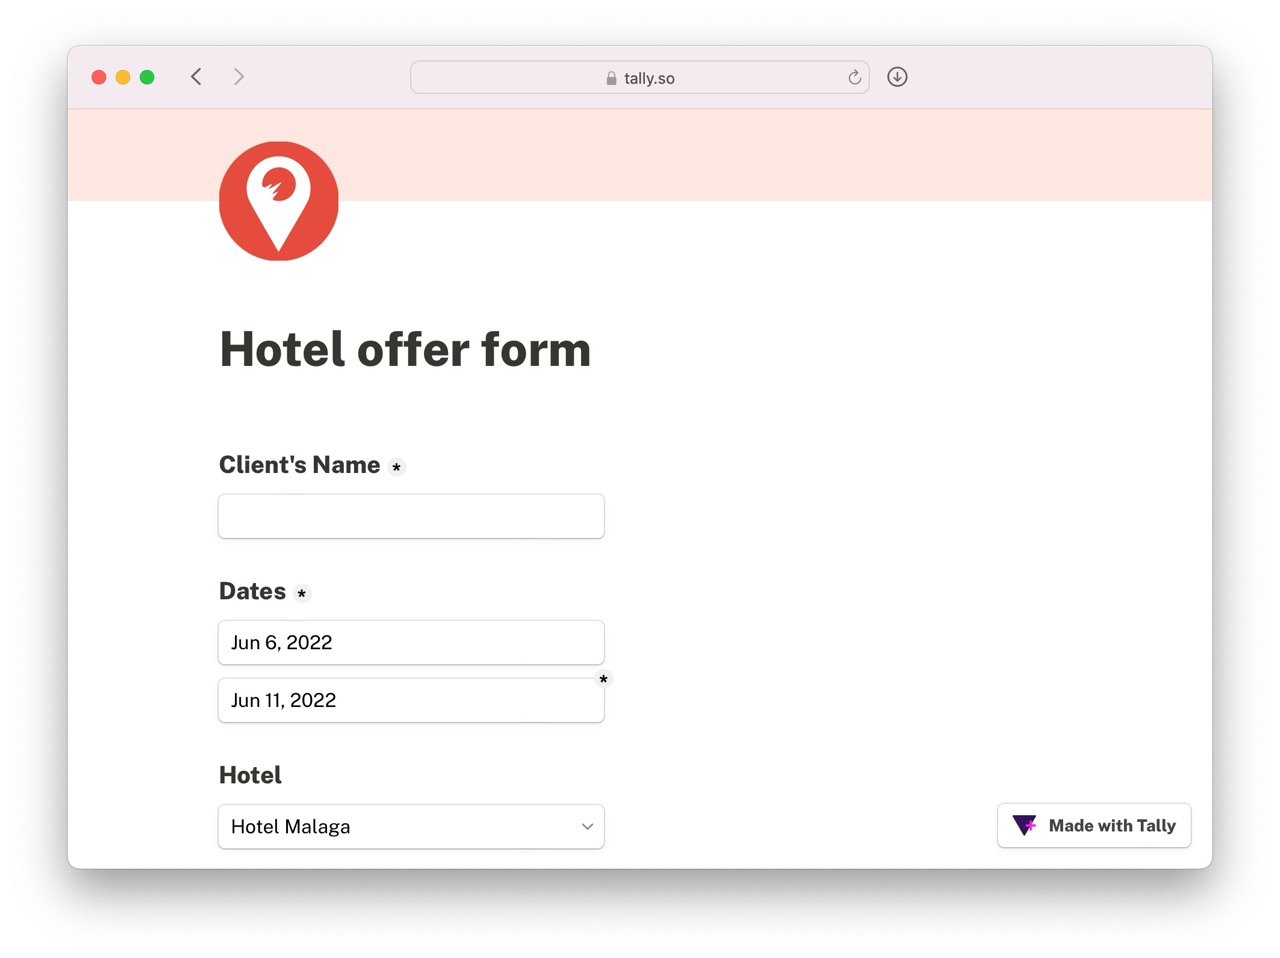
For this example, I built a simple Tally form that collects all the data needed to create a hotel offer for a client: hotel name, travel dates, price, availability, and so on.
Once the form is submitted, the automation kicks in and sends the client a personalized email—including a dynamically generated image built from the submitted data.
Step 2: Create an Image Template in RenderForm
Next, design your image template using the RenderForm editor. Each editable field (like hotel name, price, or availability) becomes a template component that can be dynamically updated via automation.
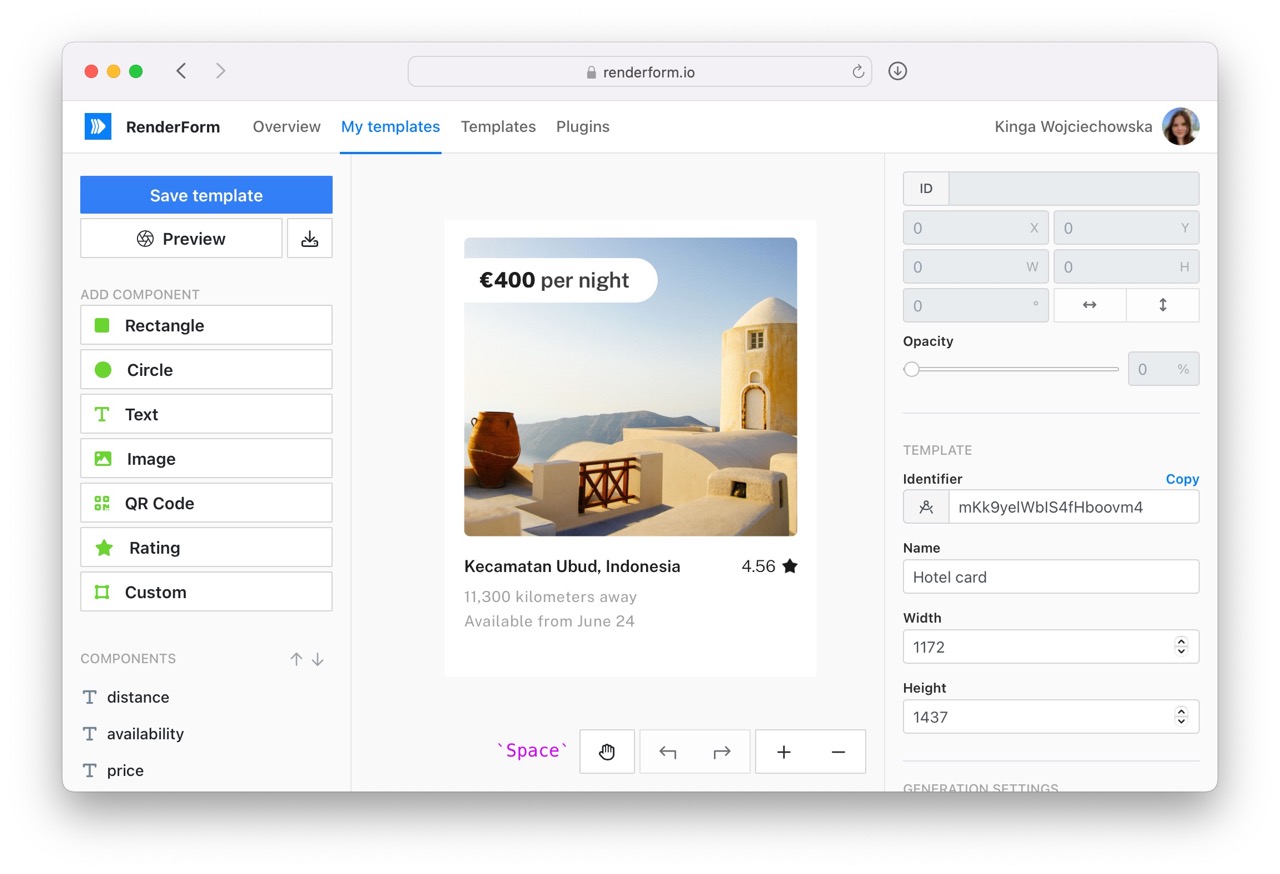
In this case, I created template components such as title, price, and availability, all of which will be filled in automatically using data from the Tally form. For example, the "Price" field submitted in the form will replace the price component in the RenderForm template.
Step 3: Configure Image Generation in Make.com
Now it’s time to tie it all together. Add the RenderForm module to your Make scenario.
Start by searching for RenderForm in Make’s app library and add it to your scenario. To connect your account, you’ll need your API key, which can be found in your RenderForm account settings.
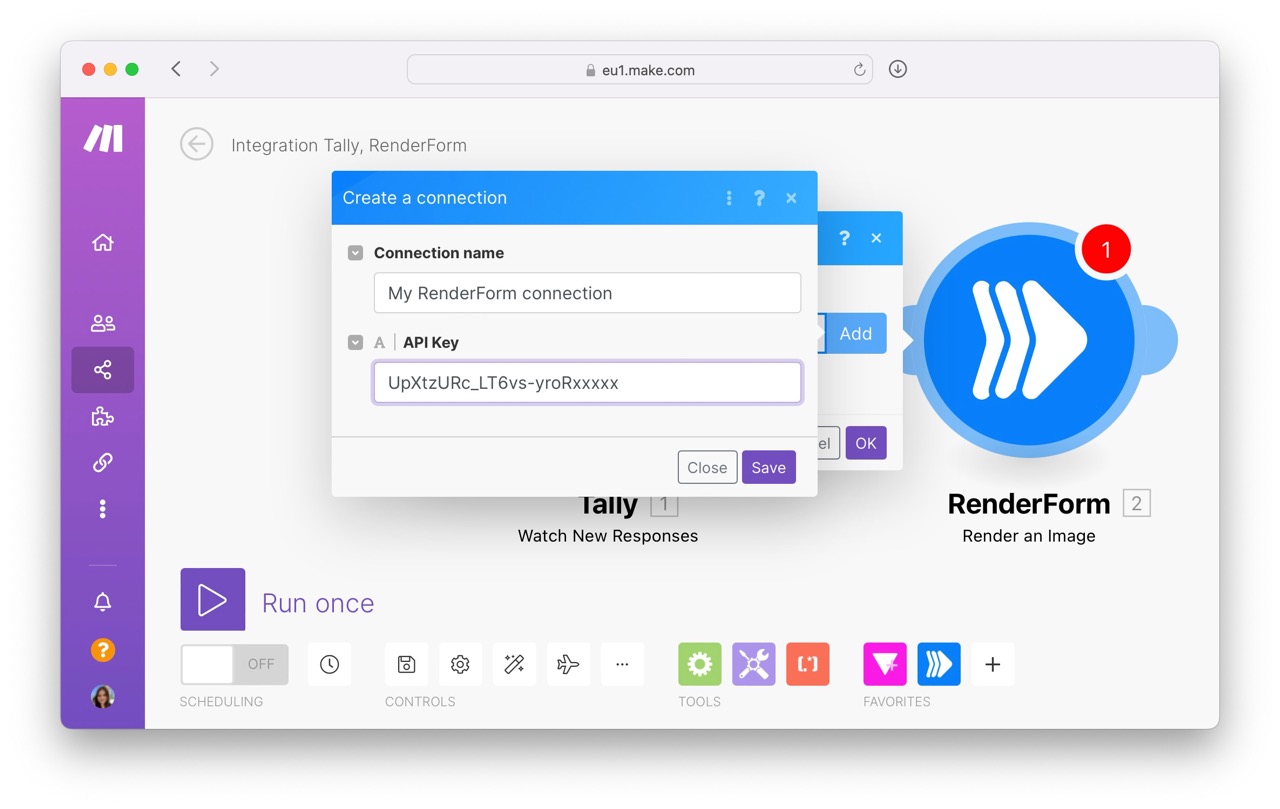
With the module connected, configure the image generation step:
- Select Template – Choose the image template you created earlier.
- Changes Section – Map form inputs (from Tally) to the appropriate components in your RenderForm template.
Each template component (like title or price) must be assigned a corresponding value from the form submission.
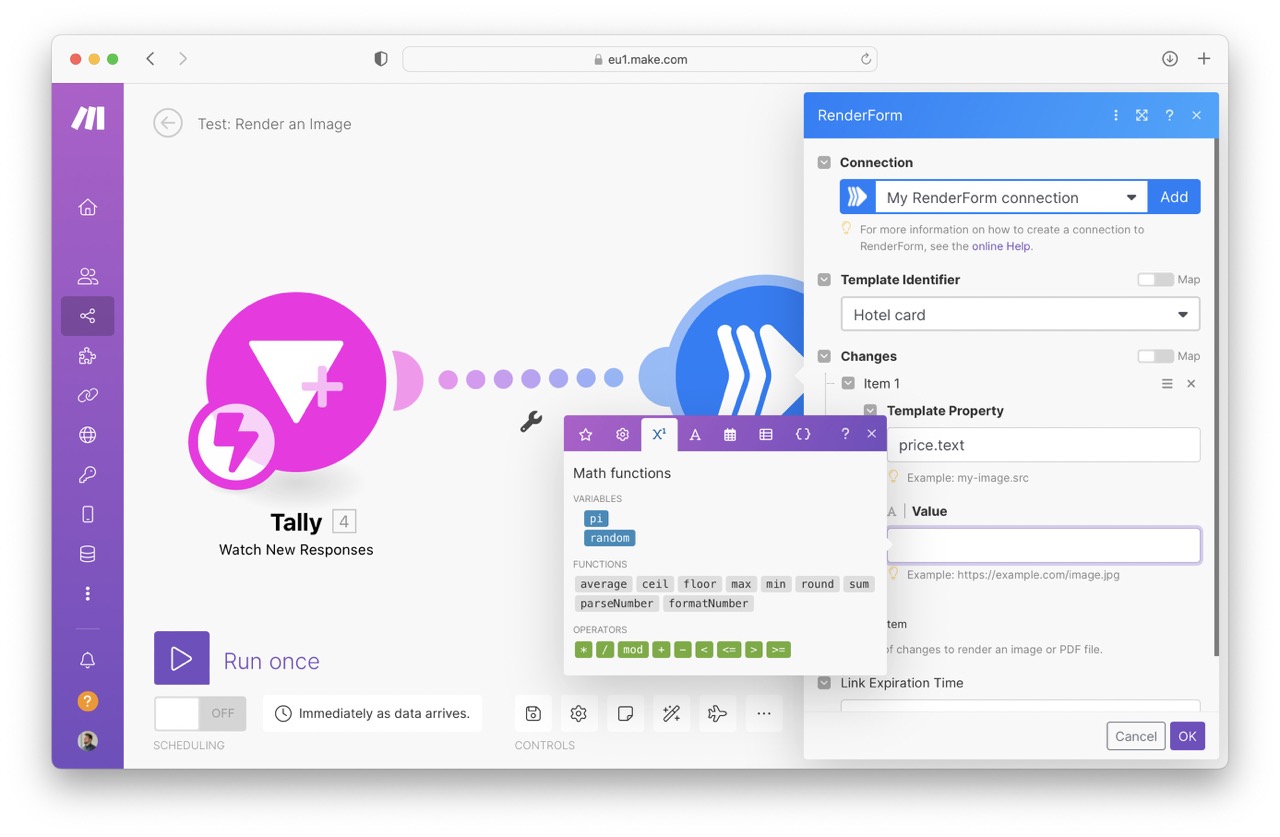
For example, if your template has a component named price, you would link it to the Price field from your Tally form submission. This ensures that each form entry results in a fully customized image.
Step 4: Run the Automation
Once everything is configured, it’s time to run your automation.
Each time someone submits the Tally form, Make.com will send the data to RenderForm, which generates an image using your predefined template. The image can then be sent automatically via email or used in any number of follow-up actions.

You can download the generated image, save it to the cloud, or attach it directly to your email—all as part of your automated scenario.
Imagine generating hundreds of images, all from a simple form!
Use Cases for Automated Image Generation
Automated image generation is especially useful for teams and creators who need to generate many consistent visual assets quickly. Here are some practical examples:
- Marketing campaigns – Create dynamic visuals personalized for each recipient.
- Email personalization – Automatically generate unique images for email campaigns. Learn how it works with Mailchimp.
- Dynamic blog covers – Use templates to create visually coherent post covers. You can even generate images from a spreadsheet.
- Image hosting – Automatically store and serve your generated images.
Whether you're a solo entrepreneur or part of a larger marketing team, automating image generation saves time, reduces manual work, and improves consistency across your brand visuals.
Try RenderForm for free and explore how it can revolutionize your image workflows with simple tools and powerful automation features.


