Image Generation with Zapier

Zapier is a leading no-code automation platform that allows you to connect your favorite apps and automate repetitive tasks. Whether it’s sending emails, updating databases, or generating images—Zapier helps you build powerful workflows without writing a single line of code.
It supports hundreds of app integrations, making it a great solution for automating marketing, sales, and admin tasks. One such use case? Automated image generation using RenderForm.
With just a few clicks, you can set up a Zap that generates images dynamically using your own templates—or even take a screenshot of a website.
Quick Start: Create a Custom Image with Zapier
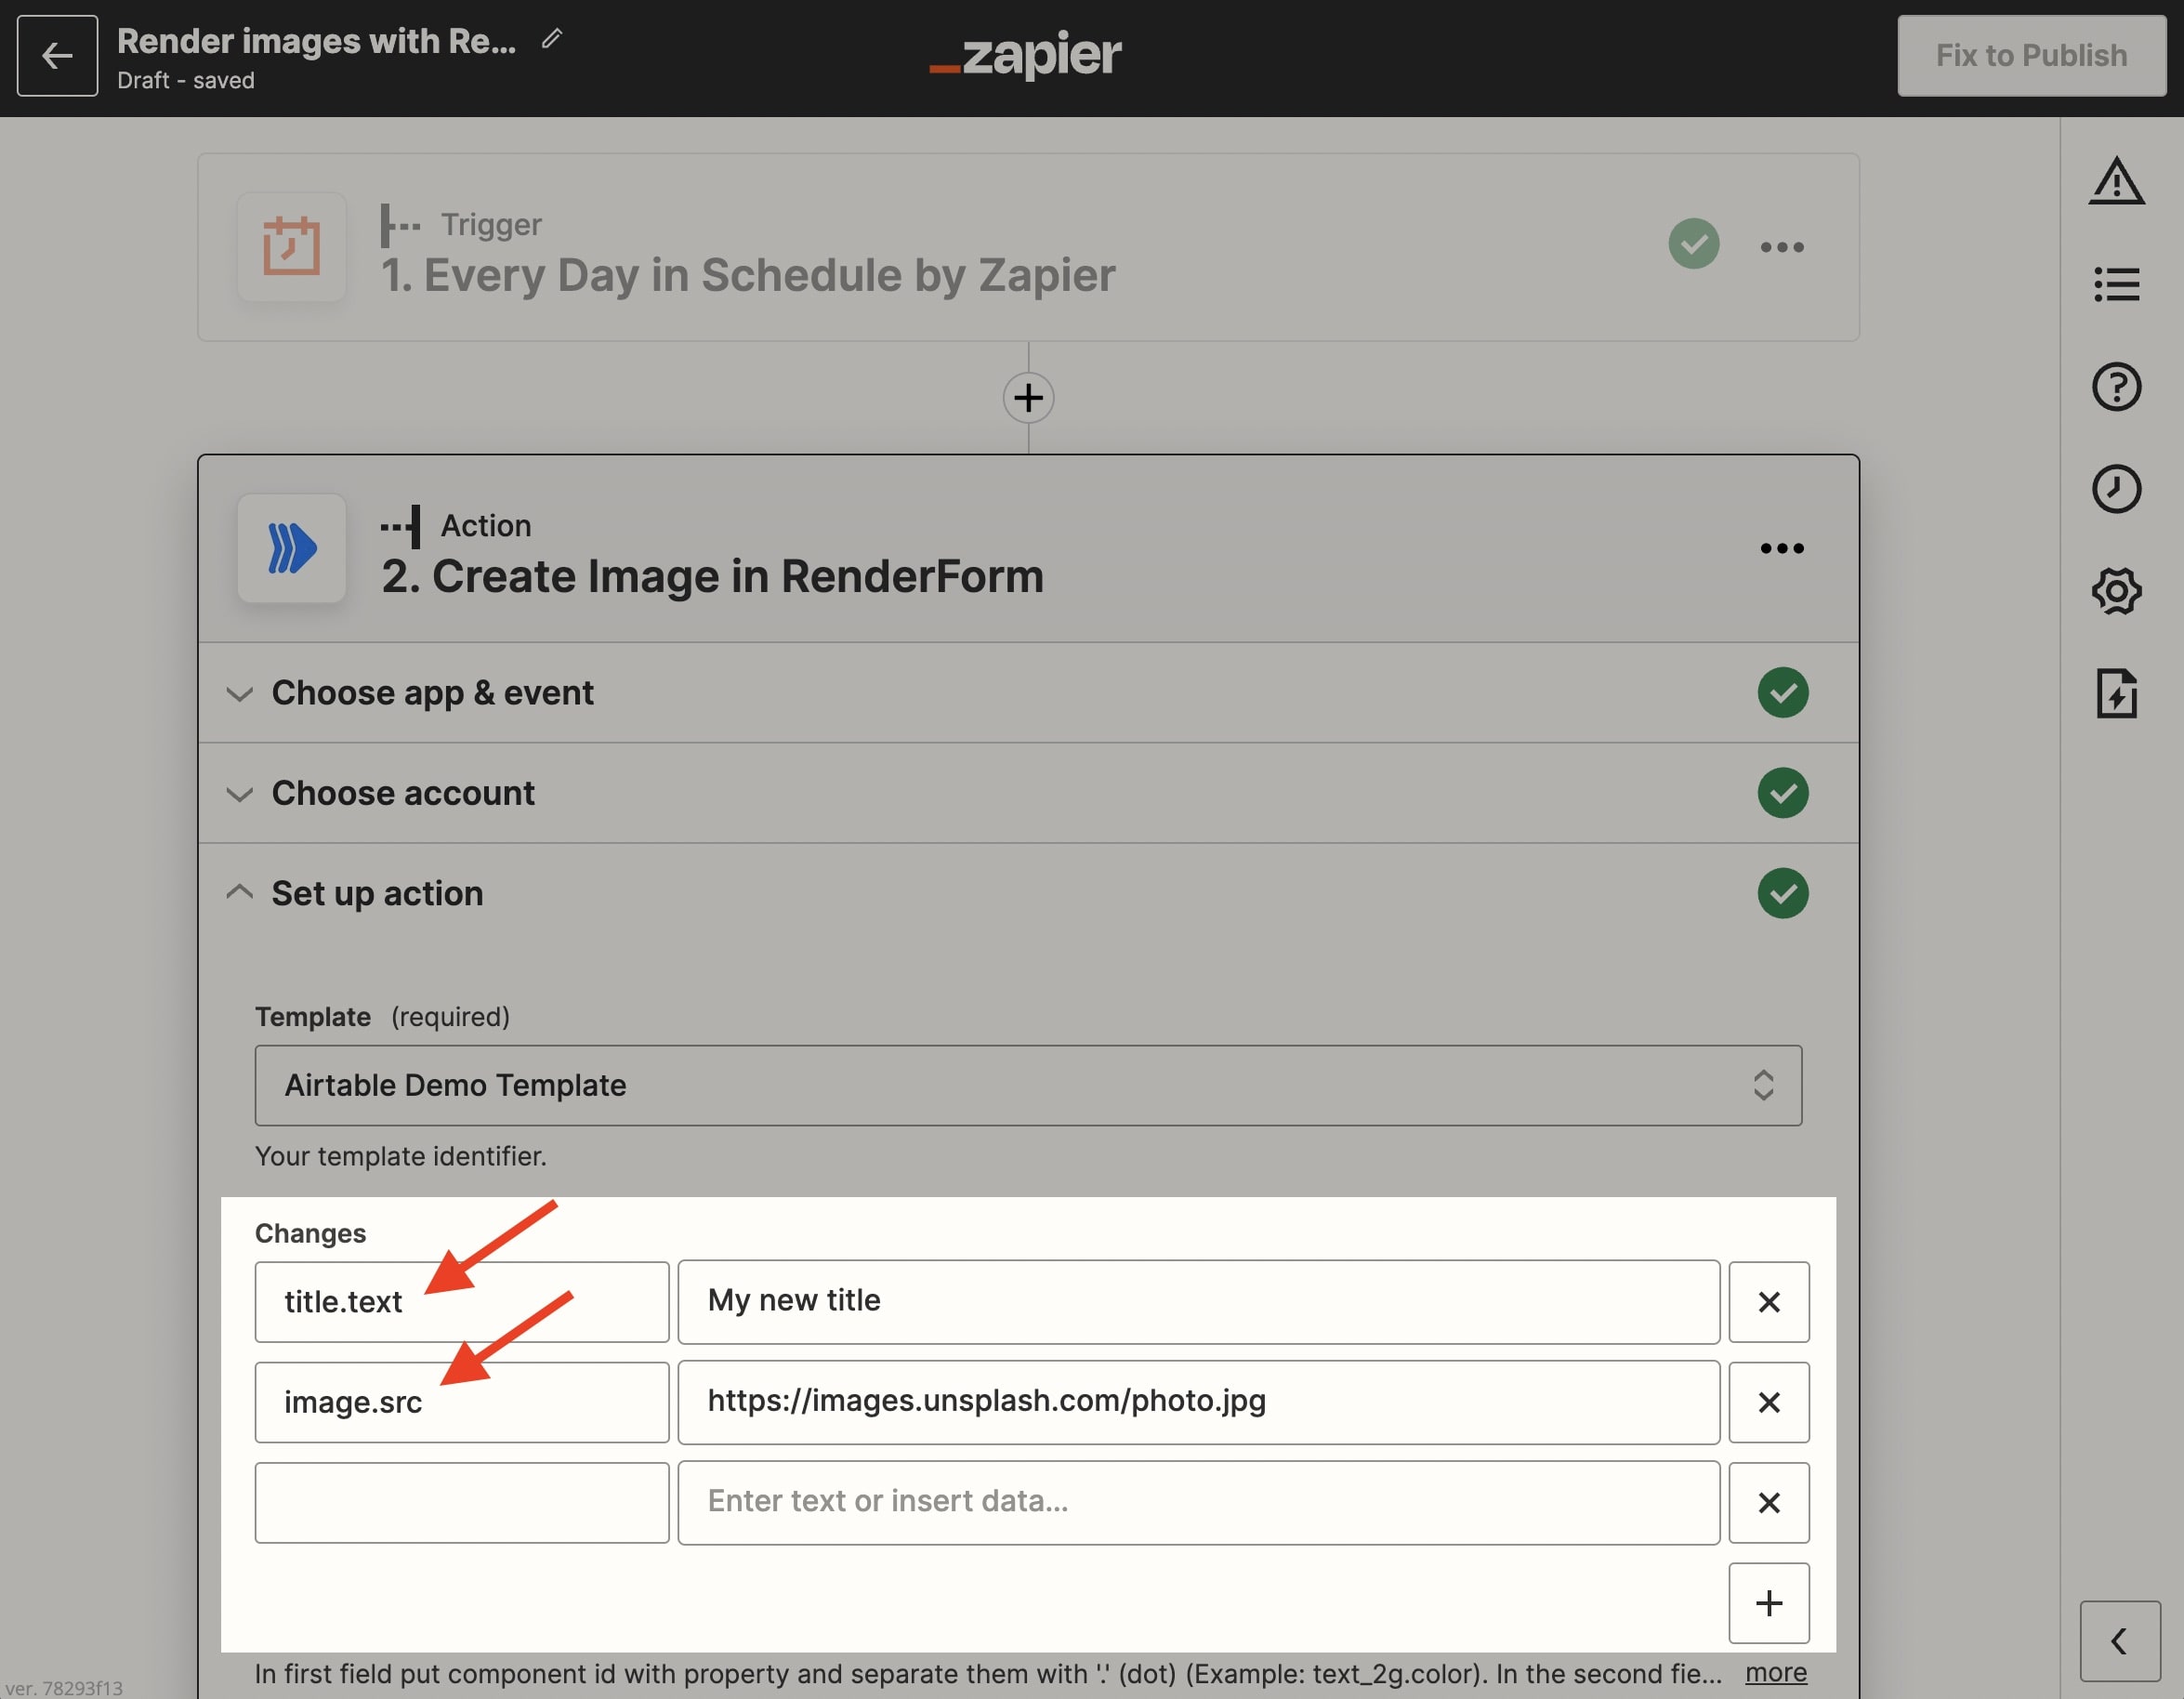
To get started, search for RenderForm in the Zapier App Directory and select the "Create Image" action. Choose the template you'd like to use, and in the Changes section, define which elements should be replaced dynamically.
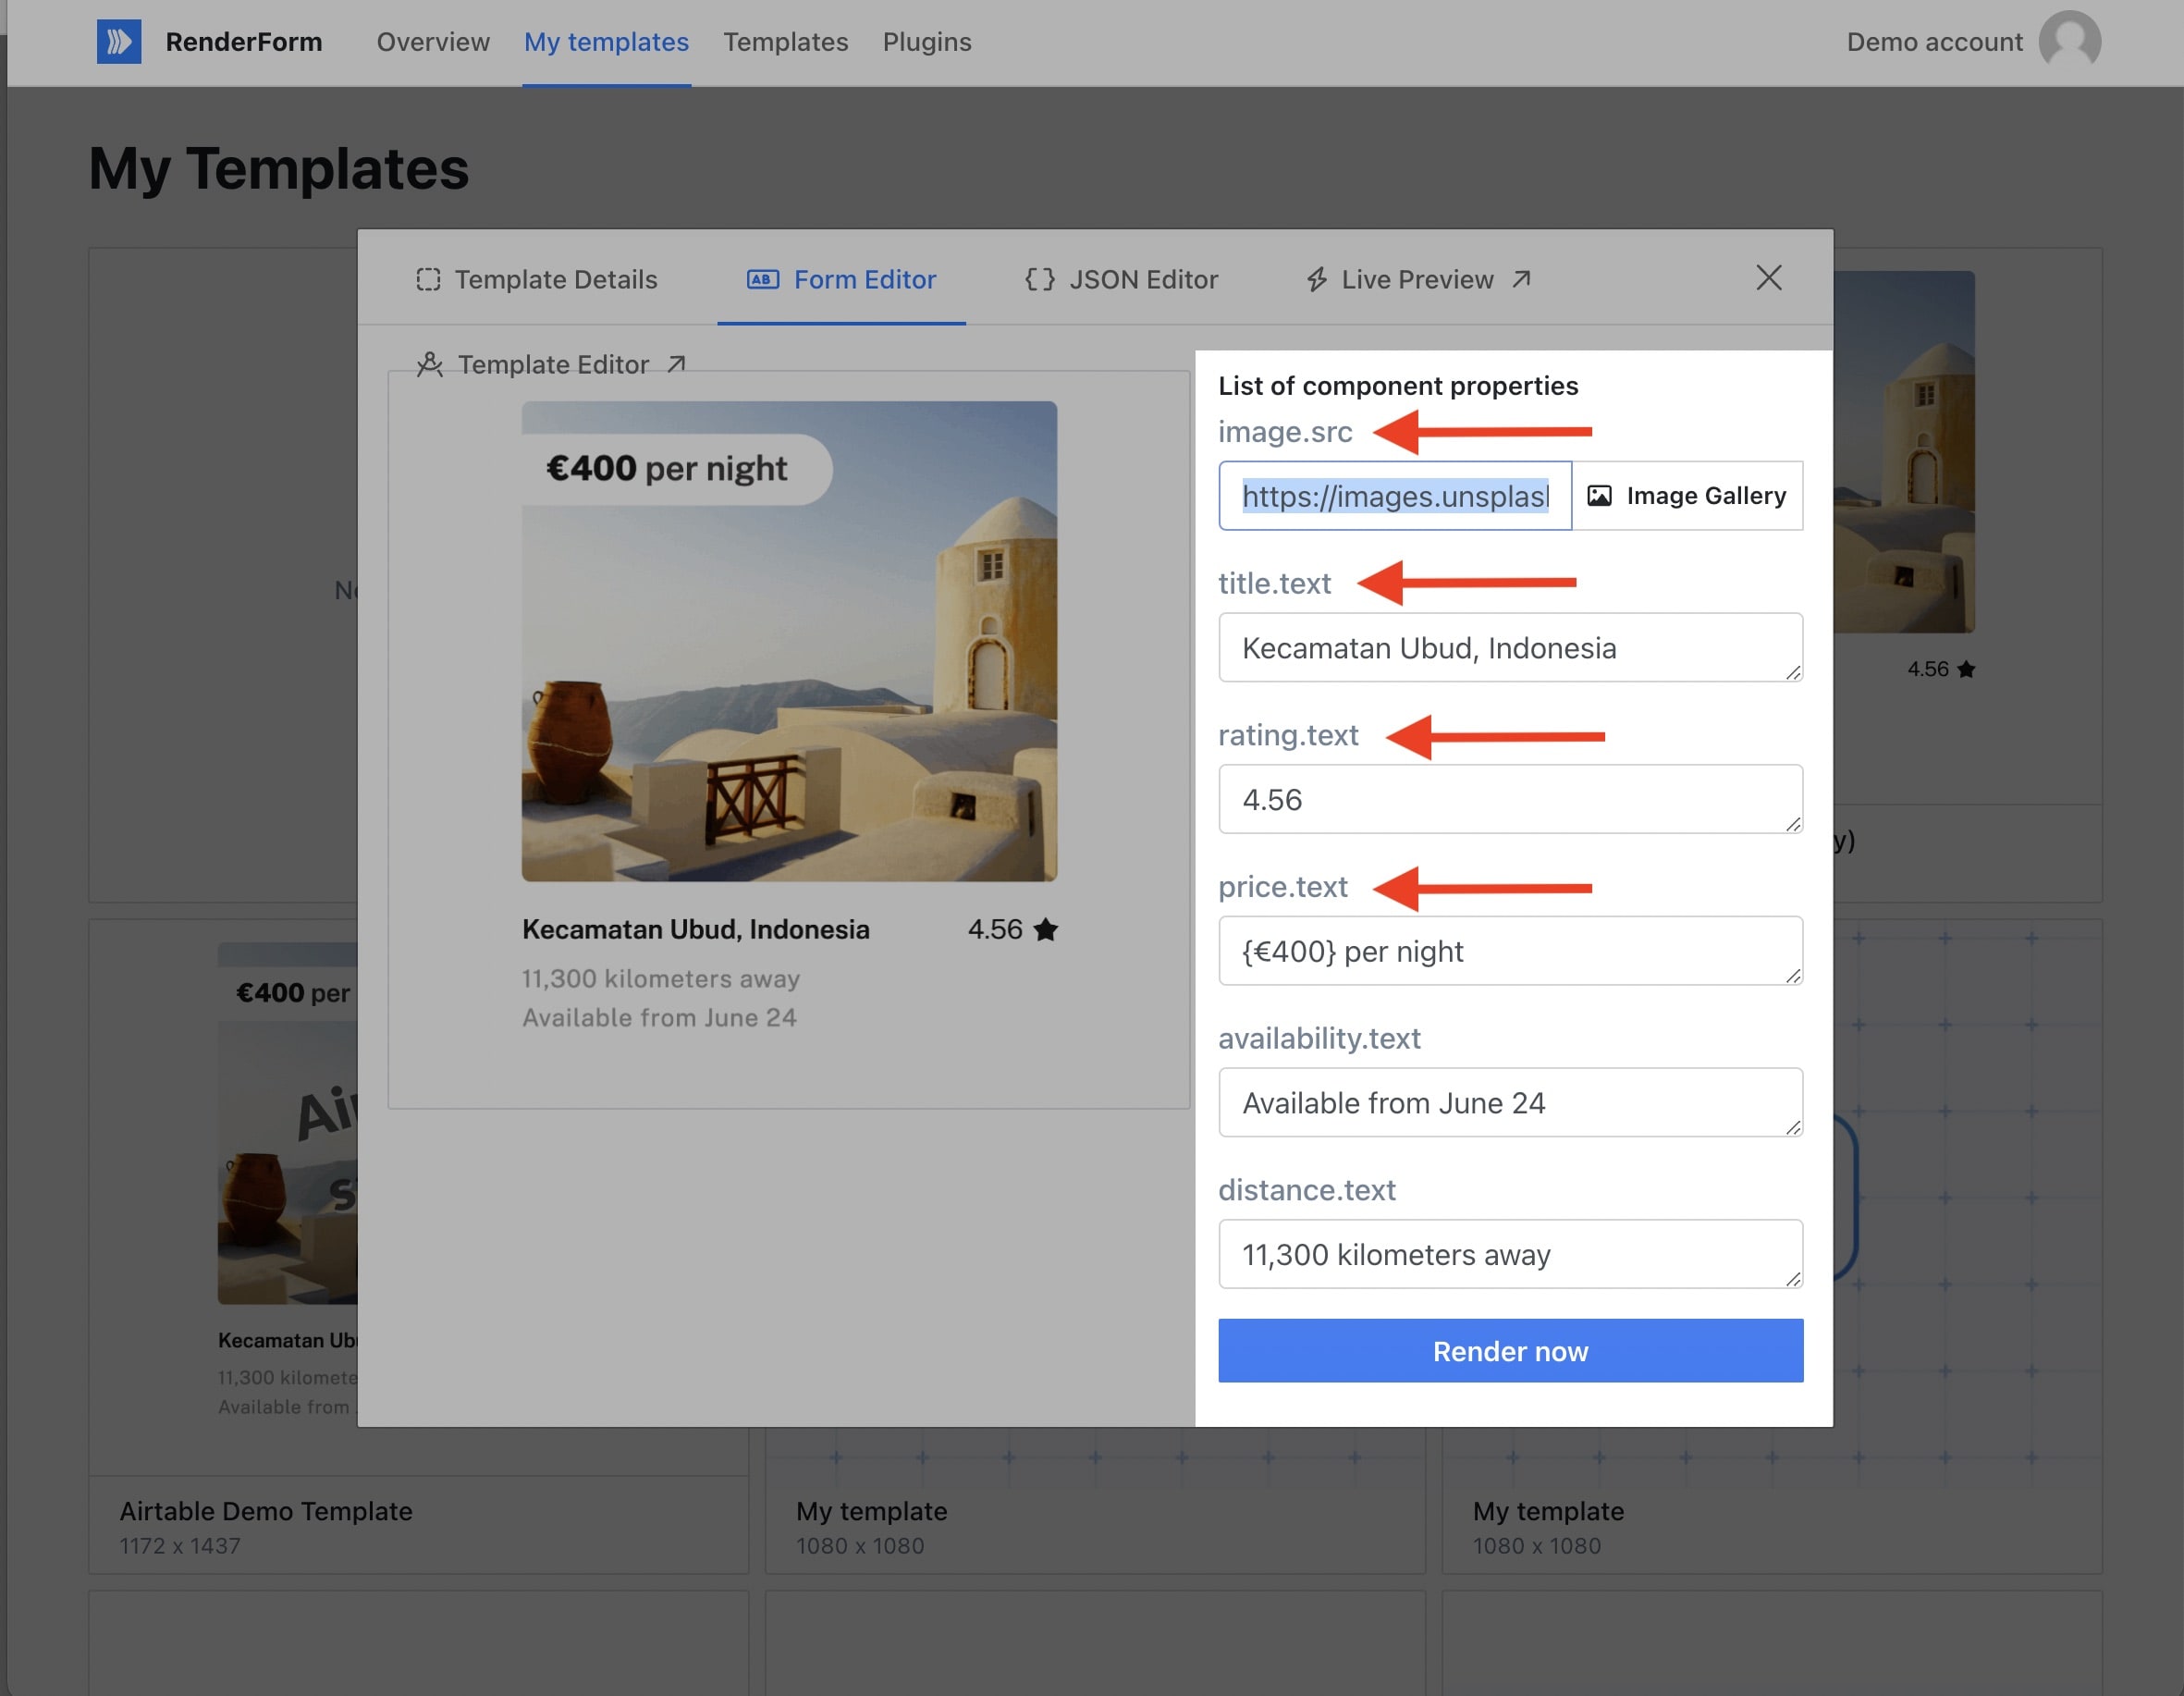
To find the list of editable properties for your template, open the template preview in RenderForm and switch to the Form Editor tab.
For a complete guide to template properties, check out the RenderForm docs.
Why Automate Image Generation?
If you're manually creating dozens of similar images—like product cards, social banners, or personalized emails—automation can save you hours of repetitive work. Just set up a template once and let Zapier take care of generating images for new data entries.
The basic idea is to automatically replace parts of your image template with new content, such as names, prices, images, or dates. This is perfect for:
- Personalized email campaigns
- E-commerce product visuals
- Blog or social media graphics
Let’s walk through an example using RenderForm + Zapier + Tally forms.
How to Automate Image Generation with Zapier
Zapier makes automation easy. In this case, we’ll set up a three-step workflow:
- Set a trigger (e.g. a new form submission),
- Create an image template in RenderForm,
- Configure the image generation in Zapier.
Let’s go through it step by step.
Step 1: Set the Trigger Event
We’ll start by creating a trigger that will launch the image generation process. This can be anything—from a new lead or calendar event, to a form submission or database update.
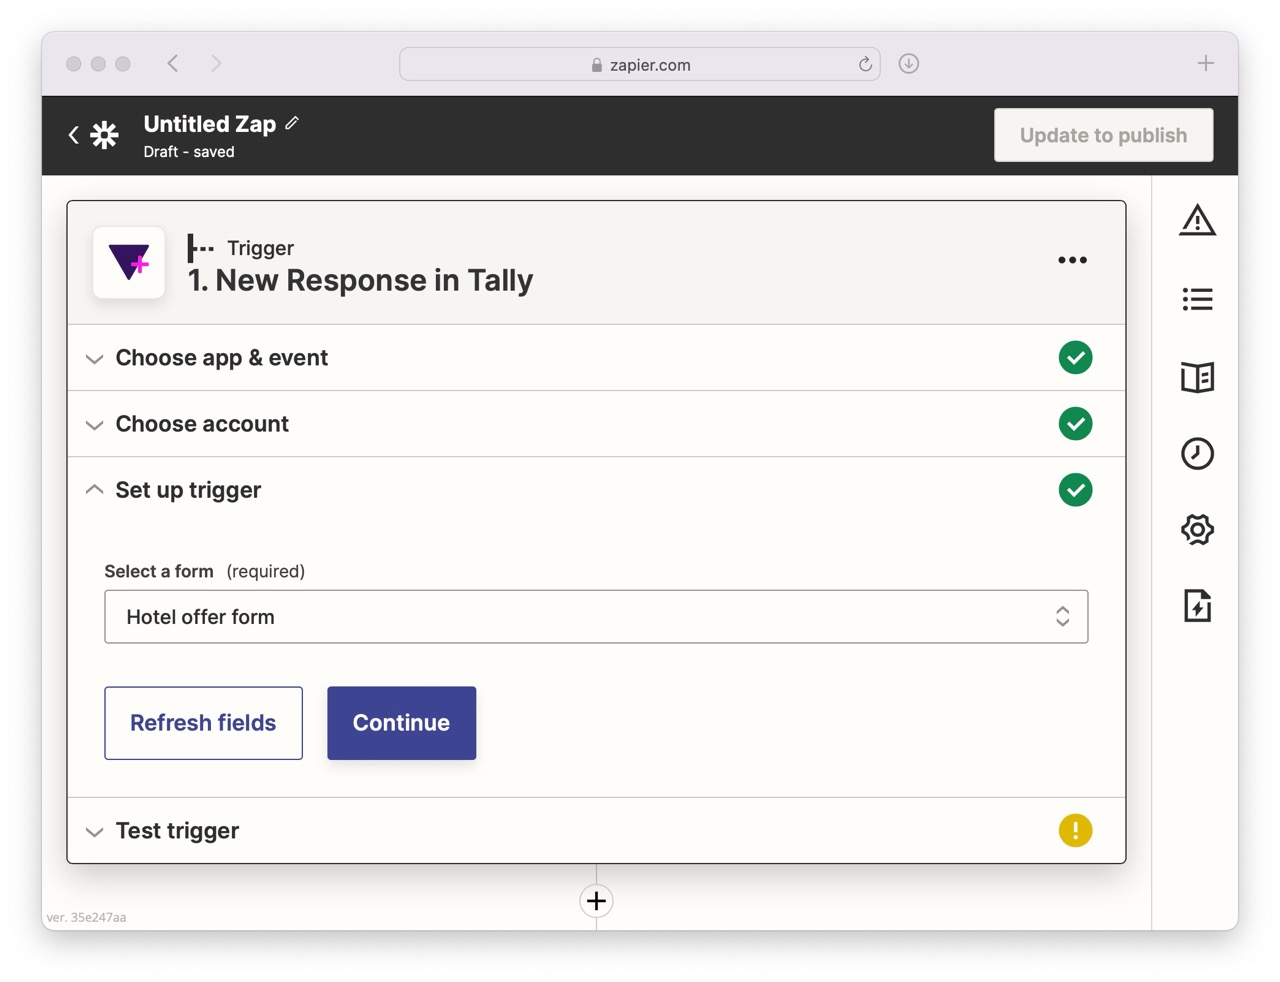
In this example, our trigger will be a new form submission from Tally.
- In Zapier, create a new Zap.
- Set Tally as the trigger app.
- Connect your Tally account and select the form you want to use.
- Let Zapier test the connection to make sure data can be pulled correctly.
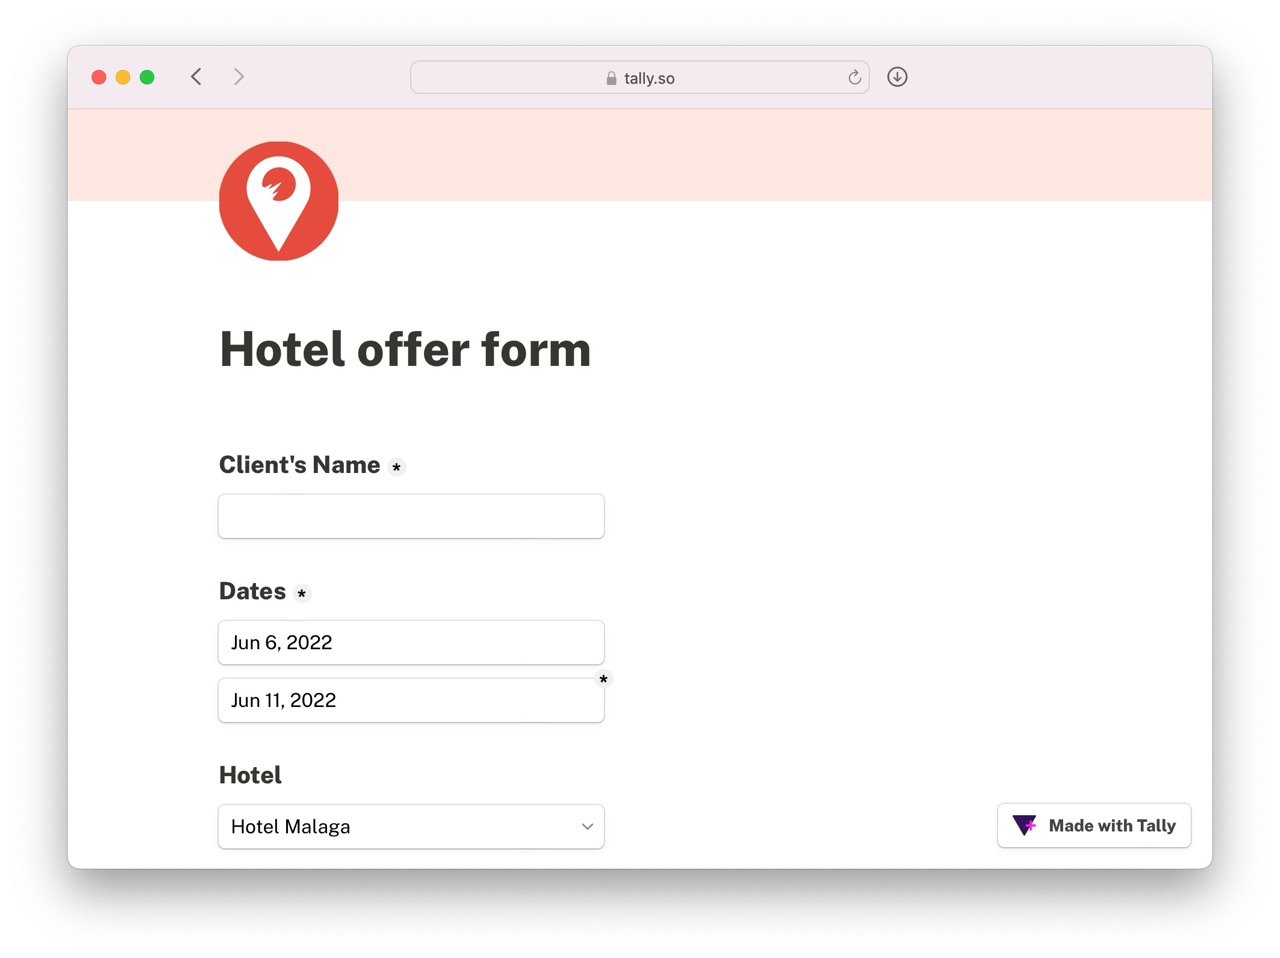
What’s the use case? I created a simple Tally form that gathers details needed to create a hotel offer for a client—like hotel name, dates, price, and availability.
Step 2: Design Your Image Template in RenderForm
Next, we’ll create an image template in RenderForm. Each editable field in your template—like price, title, or image—will act as a dynamic component that Zapier can update automatically.
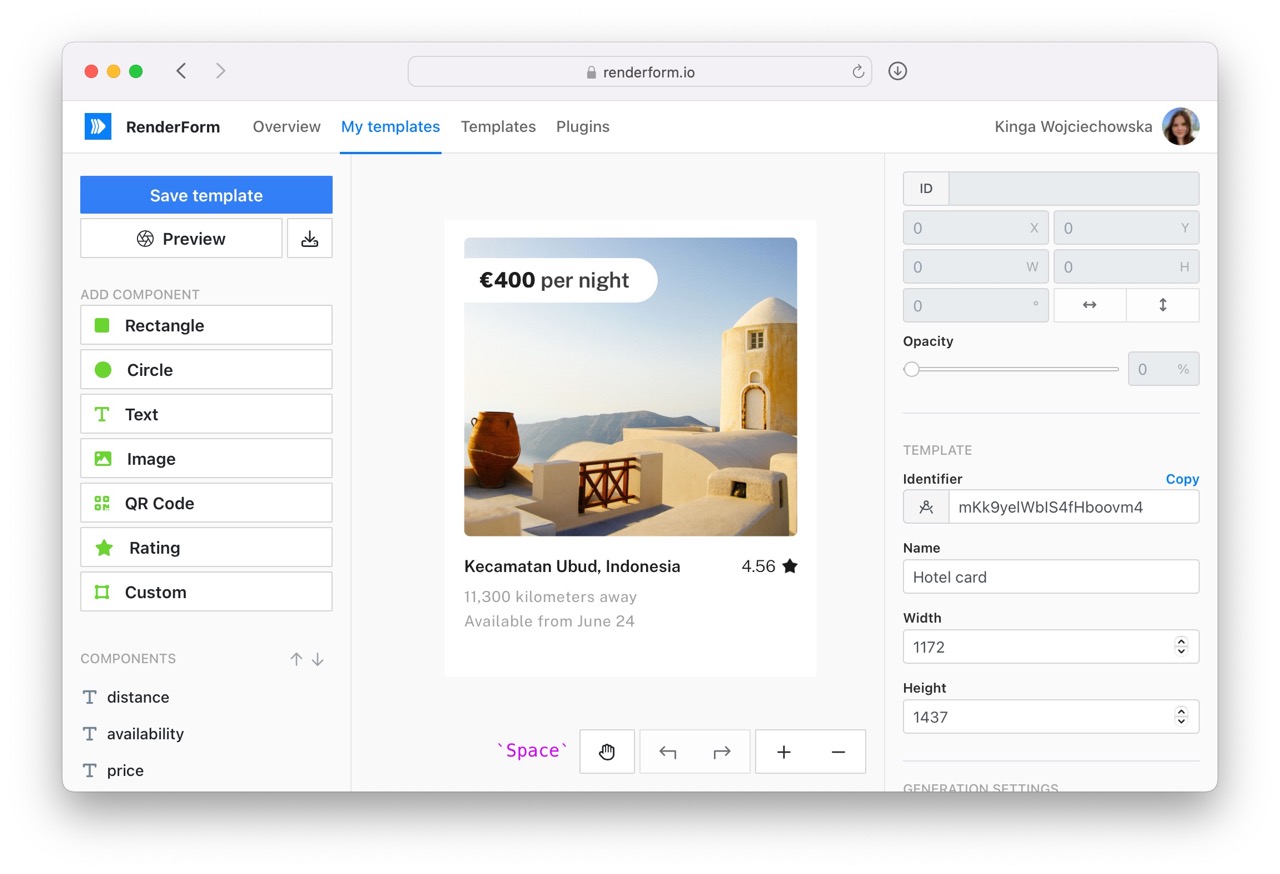
In this example, I’ve created components for the hotel name, price, availability, and main image. Each time the form is submitted, these fields will be replaced with the corresponding values from Tally.
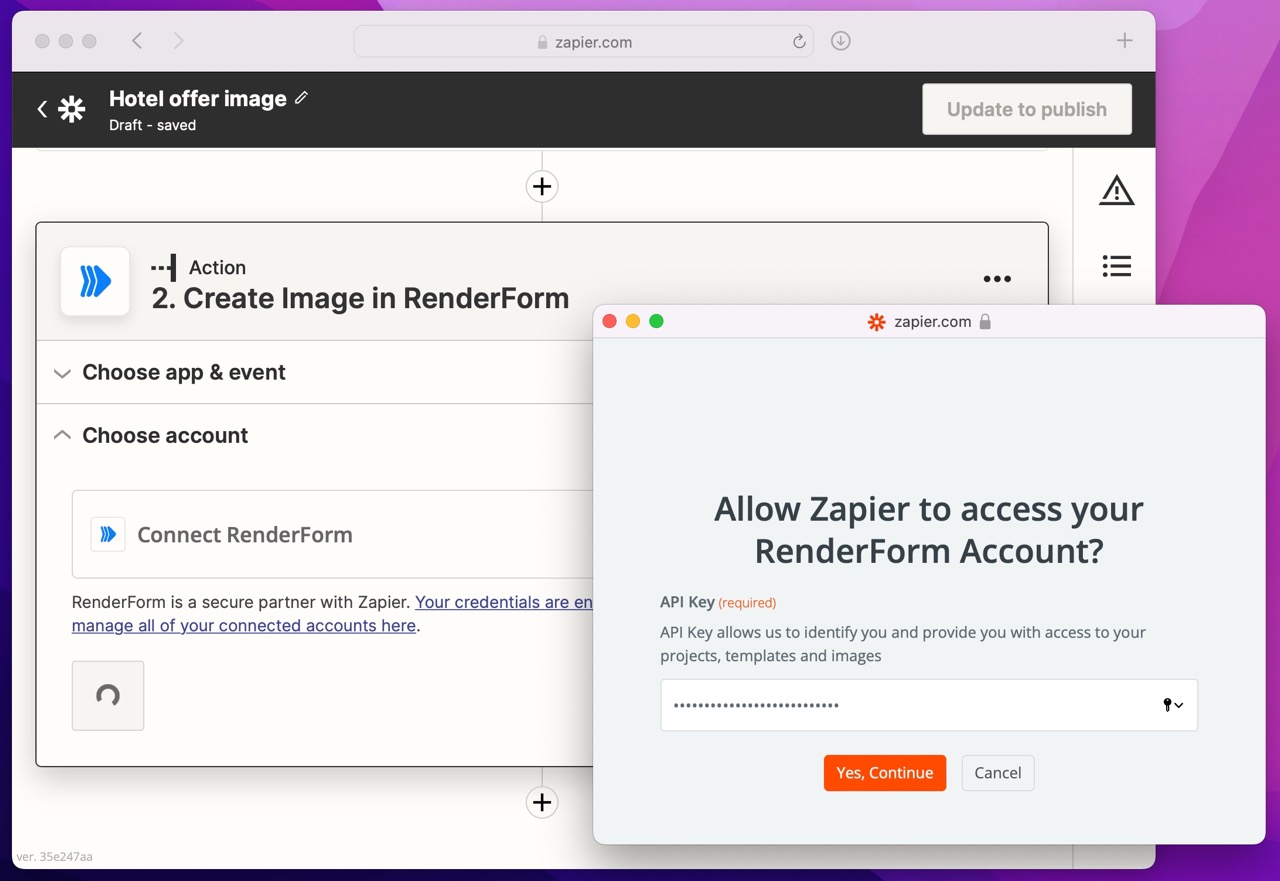
Step 3: Create the Image in Zapier
The final step is to connect RenderForm to your Zapier workflow and configure the image generation.
- Add a new action to your Zap.
- Choose RenderForm and select the "Create Image" action.
- Connect your RenderForm account using your API key.
Now configure the image generation:
- Component Name – On the left side, enter the component name and type, e.g.
price.text(to target thepricecomponent of typetext). - Form Field – On the right side, choose the corresponding Tally field that should populate the image component.
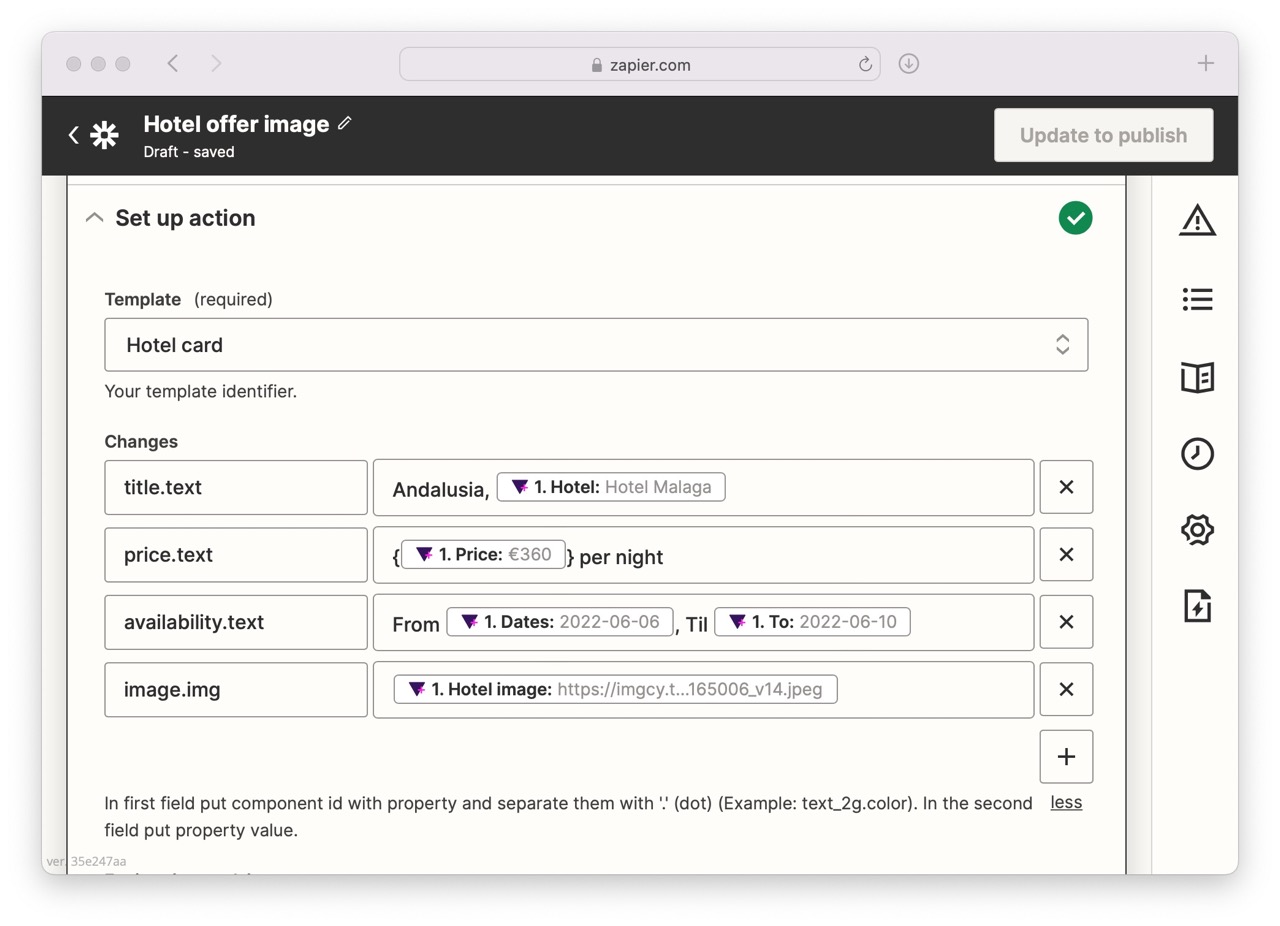
Repeat this process for each element you want to update dynamically in your image.
Test and Run the Automation
Once your Zap is configured, save it and let Zapier run a test. If everything is set up correctly, you’ll get a new image generated from your form submission—complete with all the personalized details.

Don’t forget to turn on your Zap so it actively listens for new submissions.
That’s it! The entire setup takes just a few minutes, and the results can dramatically speed up your workflow.
Ideas & Use Cases
Once you’ve got image generation working, here are a few creative ways to expand your workflow:
- Automatically generate social media graphics for new blog posts
- Create custom product cards with prices from Google Sheets or Airtable
- Generate dynamic banners for newsletter emails
- Use screenshots to document website changes or generate content previews
You can even chain Zapier actions together to upload generated images to Google Drive, send them via Slack, or publish them online.
Resources
Ready to try it out? Head over to Zapier


